Why settle for the conventional burger bun, when you could opt for a healthier, more nutritious, albeit fun alternative! Below are 10 of my favorite burger bun alternatives- many of which you might already have in your fridge or pantry:
1) White or Brown Rice (I think brown rice would give a nice chewier texture, and would boost up the fiber content, but either would be delicious). If I were to try this, I would probably grill the rice patties on a skillet so they were nice and crunchy on the outside:
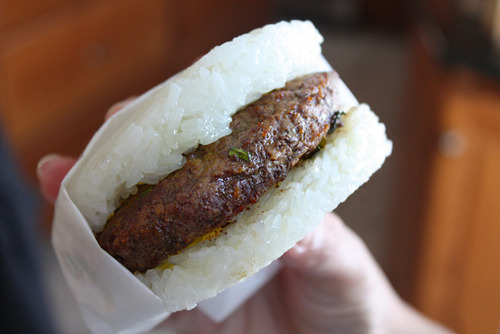
Photo: http://shesimmers.com/
2) Grilled Sweet Potato (or White, Red Potato:

Photo: http://thebettyrocker.com/sweet-potato-sliders/
3) Portobello Mushrooms:

Photo: http://toquegirls.com/turkey-feta-burgers-and-portobello-mushroom-buns/
4) Zucchini:

Photo: http://www.queenofquinoa.me/2012/08/herbed-turkey-burgers-with-zucchini-buns/
5) Eggplant:

Photo: http://evolvedcampfire.wordpress.com/2012/03/28/hamburger-with-grilled-eggplant-bun/
6) Collard Green:

Photo: http://lifehowirunit.blogspot.ca/
7) Tomato (but it would have to be a biggie for the burgers I eat!):

Photo: http://www.theironyou.com/2013/08/tomato-avocado-burgers-low-carb-and.html
8) Romaine Lettuce:
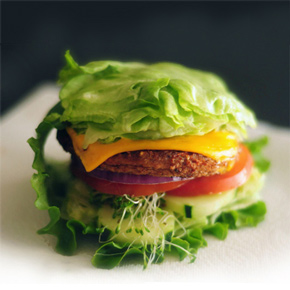
Photo: http://lowcarbediem.com/winning-the-low-carb-bread-war/
9) Flax Bun (RAW):

Photo: http://www.rawon10.com/2010/04/april-18-2010.html
10) Cauliflower (I would substitute the egg in this recipe with a flax egg):

Photo (and recipe): http://www.rippedrecipes.com/recipe/cauliflower-burger-buns-614.html
1) White or Brown Rice (I think brown rice would give a nice chewier texture, and would boost up the fiber content, but either would be delicious). If I were to try this, I would probably grill the rice patties on a skillet so they were nice and crunchy on the outside:
Photo: http://shesimmers.com/
2) Grilled Sweet Potato (or White, Red Potato:
Photo: http://thebettyrocker.com/sweet-potato-sliders/
3) Portobello Mushrooms:
Photo: http://toquegirls.com/turkey-feta-burgers-and-portobello-mushroom-buns/
4) Zucchini:
Photo: http://www.queenofquinoa.me/2012/08/herbed-turkey-burgers-with-zucchini-buns/
5) Eggplant:
Photo: http://evolvedcampfire.wordpress.com/2012/03/28/hamburger-with-grilled-eggplant-bun/
6) Collard Green:
Photo: http://lifehowirunit.blogspot.ca/
7) Tomato (but it would have to be a biggie for the burgers I eat!):
Photo: http://www.theironyou.com/2013/08/tomato-avocado-burgers-low-carb-and.html
8) Romaine Lettuce:
Photo: http://lowcarbediem.com/winning-the-low-carb-bread-war/
9) Flax Bun (RAW):
Photo: http://www.rawon10.com/2010/04/april-18-2010.html
10) Cauliflower (I would substitute the egg in this recipe with a flax egg):
Photo (and recipe): http://www.rippedrecipes.com/recipe/cauliflower-burger-buns-614.html


